Managing Orders
Processing New Orders
Once you have a new order, check the order details and edit the order accordingly:
Edit[1]: Use this to edit the fields of each order item individually
Add Product[2]: Add new items you wish to have the Merchant consider for the shipment
Notes[4]: Check this section for order instructions from the Merchant, and for information from FMI Admin if any
Leave message to Merchant for this order[5]: Use this to communicate with the Merchant about the order in general.
To save the changes made, click on Update Order[3].
2. You can check the Freight Delivery Contact[1] section (in the Shipping panel) and coordination details and flight information for the order.
Freight Delivery Contact[1]: Contact person at the freight forwarder for this shipment, to coordinate delivery
Delivery Deadline[2]: Day and time by which you should deliver to the freight forwarder (usually at the departure port)
ETD[3]: Estimated departure date for flight (please note that this is not the day of delivery!)
3. In the Notes section, you can also record your Private Note[4] for the order, which would only be visible to you and fellow team members under your Vendor account.
This could be useful for sharing information within your team, or recording information regarding any exceptions in handling for this particular order.
4. For any updates or changes made to the order by the Merchant or FMI Admin, you will receive an email notification to check on the order and respond as required.
5. To confirm products for shipment, you can use the Accept buttons:
Accept New Items[1]: Confirm all newly added items in the order
Accept[2]: Confirm the relevant product only. Use this when you have to make edits or are still pending and unable to confirm other items in the order.
Remember to click on Update Order[3] to save the changes made.
6. Once you have finished responding to each item, click the Send Quote[2] button to send a quotation to the Merchant. This will prompt the Merchant to allocate the required amount from their wallet to your order.
7. Once the Merchant has allocated the required amount to the order, you will receive an email notification informing you that payment status on the order has been updated to Secured[1].This means you can proceed to start preparing the products for shipment.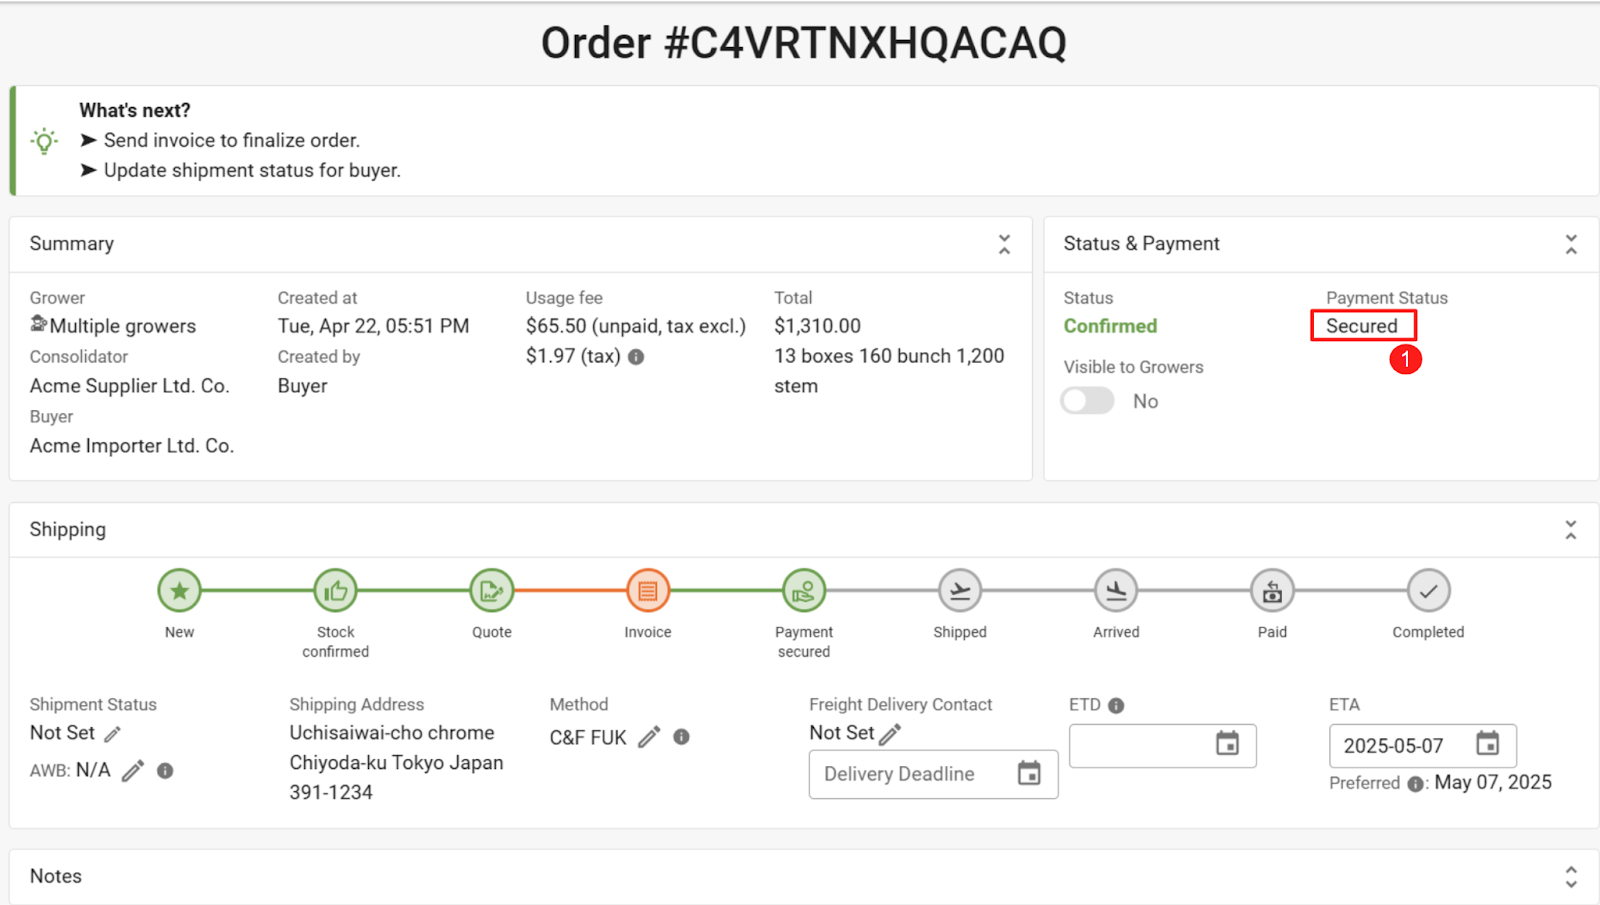
8. You can still make edits to the order after this initial confirmation if necessary. The quotation will be updated automatically once all items have been confirmed by both you and the Merchant.
9. After the shipment has been invoiced, the shipment status will be updated to Completed around 48 hours after the shipment arrives, provided there are no claims. The final invoice amount will then be deducted from the Merchant’s wallet and credited to your Vendor wallet amount.
Invoicing and Uploading Documents
1. Additional documents such as your original invoice, can be added to the order under the “Invoice & Documents” section & marked as Private. (As payment will be sent from FMI, your invoice should not be shared with the merchant.)
To complete the upload, click on Update Order.Make sure that the total amount on your original invoice is the same as the total amount on the FMI order.
2. To generate the invoice on FMI for the merchant, click on the Send Invoice button. You can choose to “Use FMI-generated invoice number” (default), or untick the option to use the invoice number from your original invoice. Click the Send Invoice button to finish.
3. Once the invoice has been generated, a packing list (P.L.) can be generated under the “Invoice & Documents” section. To proceed, click on Generate P.L.To complete the generation, click on Update Order.
4. For C&F shipments, the additional documents (eg. AWB, Phytosanitary Certificate) can be added to the order under the “Invoice & Documents” section. Drag and drop the relevant file, and select the corresponding category.To complete the upload, click on Update Order.
Related Articles
Managing Orders
Processing New Orders Once you have a new order, check the order details and edit the order accordingly. 1. To accept an order, you can select “Accept New Items” to accept all ordered items. Alternatively, you can accept or reject the individual ...Propose orders to merchant
You can proactively propose orders to merchants on FMI. To do so, click on “New Order” under the Orders page. On the New Order page, the following information needs to be completed: If there are multiple growers under the main company, select the ...Handle incoming orders
Handling orders on Flower Meister International™ is a simple and straightforward process: You accept the order’s items then issue a quote or invoice.* Your merchant arranges payment to FMI. Begin shipping your products to your merchant, and upload ...Notification Management
Notification settings can be updated on FMI under Settings > Notification Management. A.L. Subscription: for orders created by the merchant through the Availability List published to them. Automatically subscribe to new A.L.s that you create: You ...Dashboard
Dashboard is where you can see a quick overview of what’s happening under your Vendor account. Order Status[1]: An overview of all orders that have yet to be shipped, categorized by the different order status. Click on any order status category to ...